Help & How to Use
Your guide to getting the most out of PantryToGo
1. Getting Started
PantryToGo connects local businesses with customers in their community. This guide will walk you through setting up your merchant account and managing your products.
Download the App
Download PantryToGo from the App Store. The app is available for iOS devices.
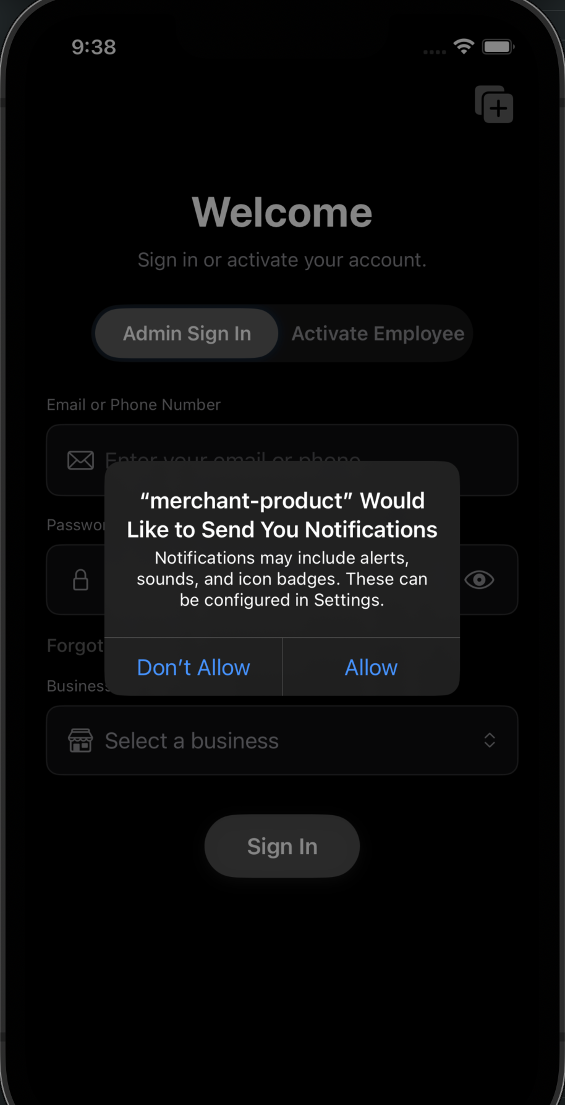
Allow Notifications
When you first open the app, you'll be asked to allow notifications. Tap Allow to receive order updates and important alerts.
2. Registering Your Business
Follow these steps to register your business on PantryToGo.
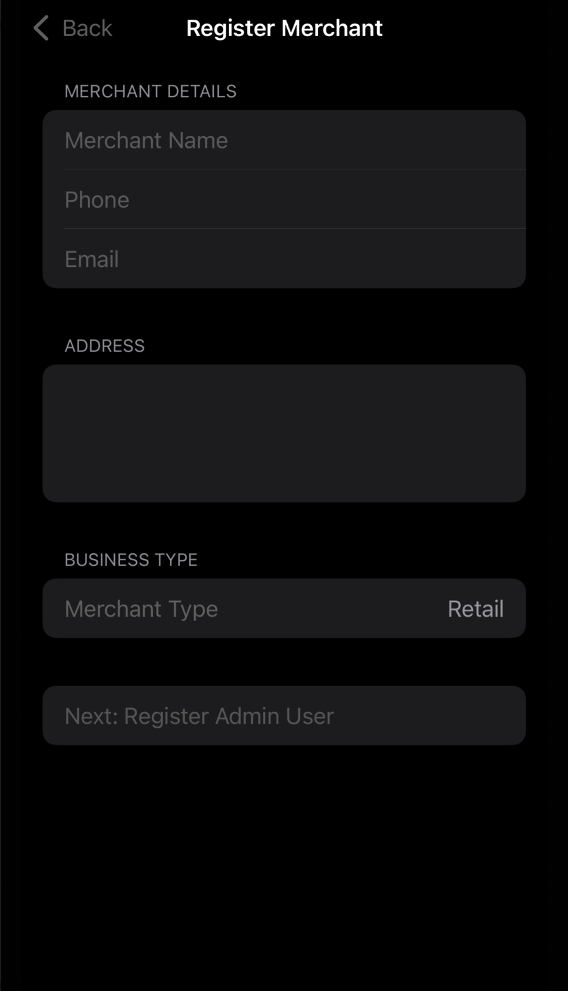
1Start Registration
On the Welcome screen, tap the + icon in the top right corner to register a new business.
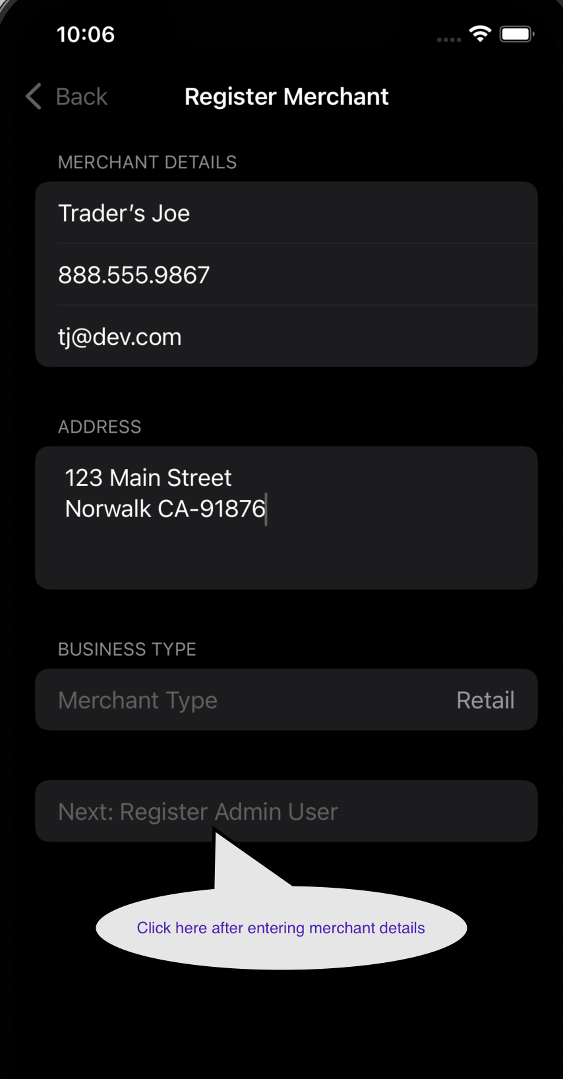
2Enter Business Details
Fill in your merchant information:
- Merchant Name: Your business name
- Phone: Business contact number
- Email: Business email address
- Address: Your store location
- Business Type: Select your merchant type (e.g., Retail)
Tap Next: Register Admin User when done.
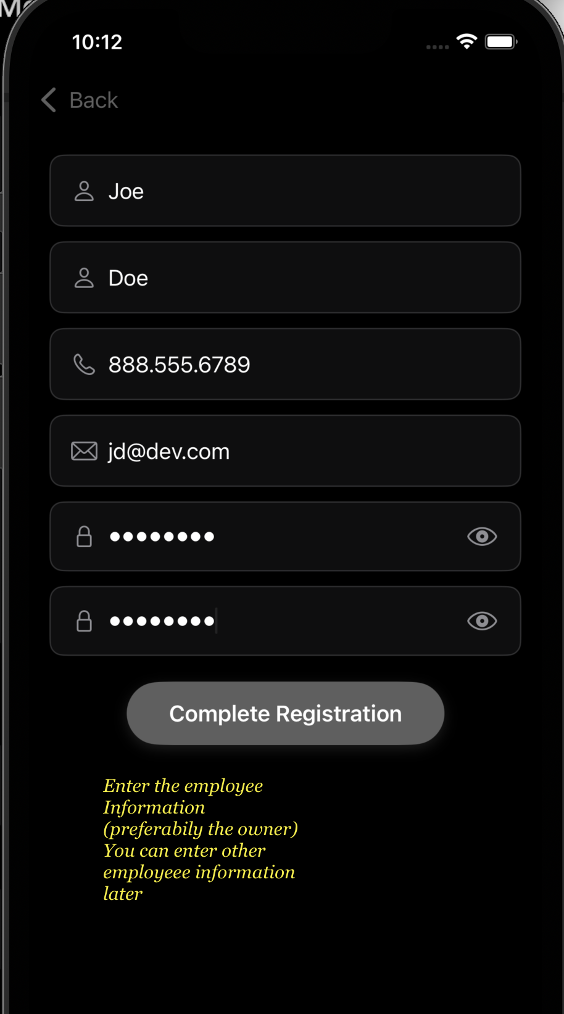
3Register Admin User
Create an admin account for your business:
- Enter your first and last name
- Provide your phone number and email
- Create a secure password and confirm it
Tap Complete Registration to finish.
Tip: The owner should be the first admin user. You can add more employees later.
3. Signing In
After registration, sign in to access your merchant dashboard:
- Select Admin Sign In on the Welcome screen
- Enter your email or phone number
- Enter your password
- Select your business from the dropdown
- Tap Sign In
4. Managing Products
Add and manage your product catalog to showcase what you sell.
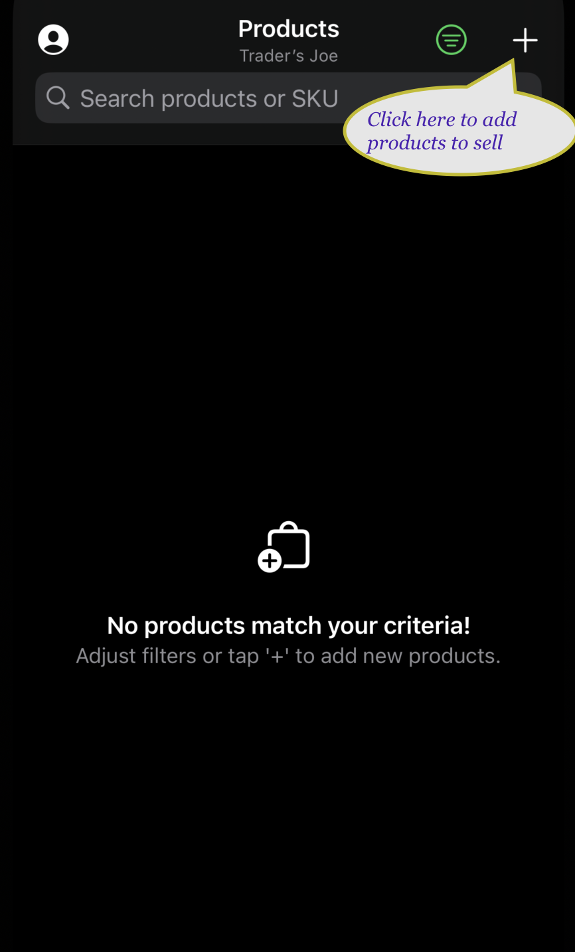
1Access Products
After signing in, you'll see the Products screen. Tap the + button in the top right to add your first product.
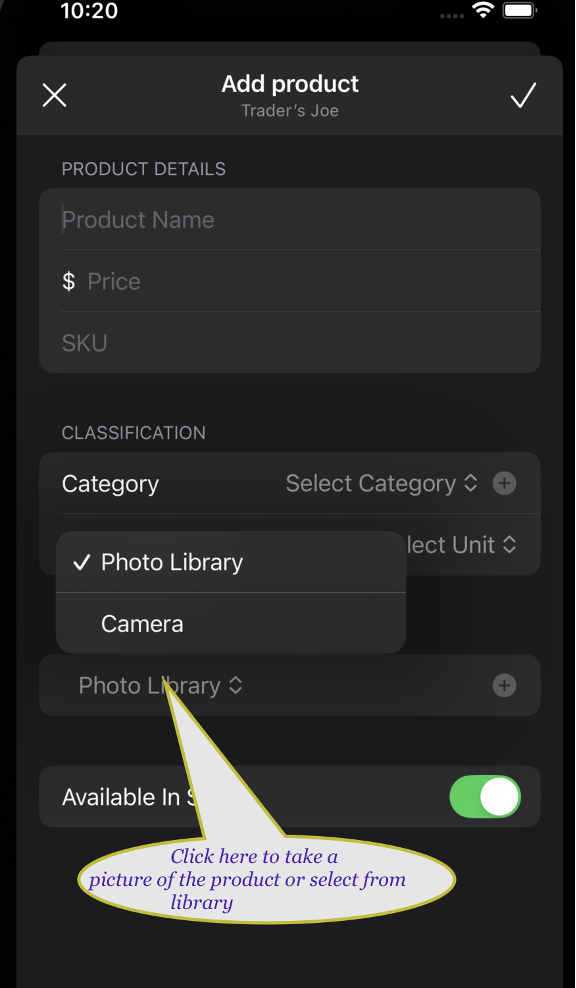
2Add Product Details
Fill in the product information:
- Product Name: Name of your product
- Price: Set your selling price
- SKU: Optional product code
- Category: Select or create a category
- Unit of Measure: How the product is sold (Each, Lb, etc.)
3Add Product Photo
Tap on Photo Library to choose how to add an image:
- Photo Library: Select from your existing photos
- Camera: Take a new photo
Toggle Available In Stock to indicate product availability.
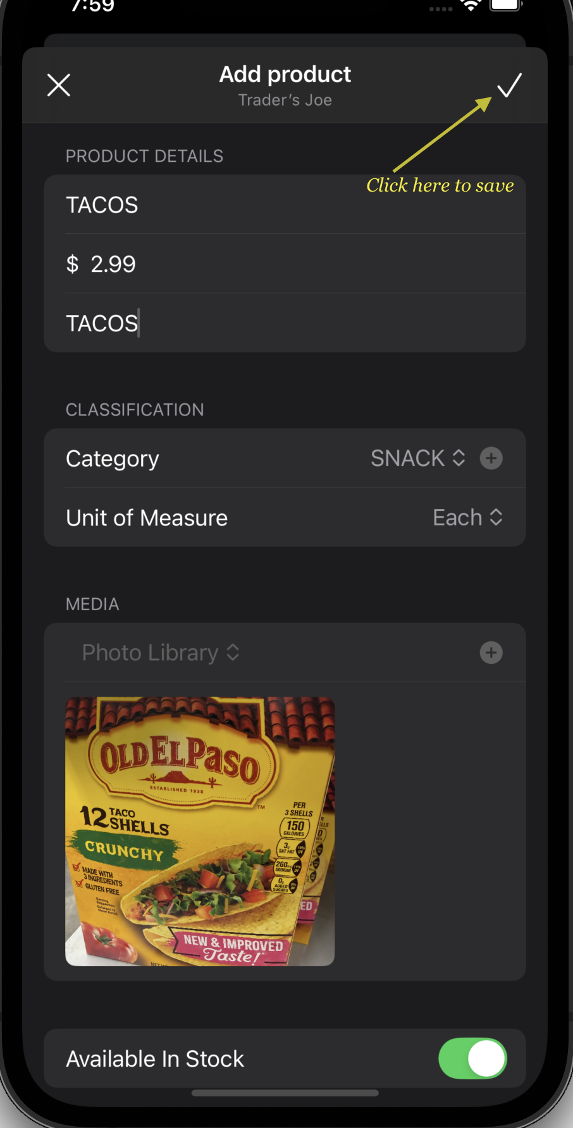
4Save & View Products
Tap the checkmark (✓) in the top right corner to save your product.
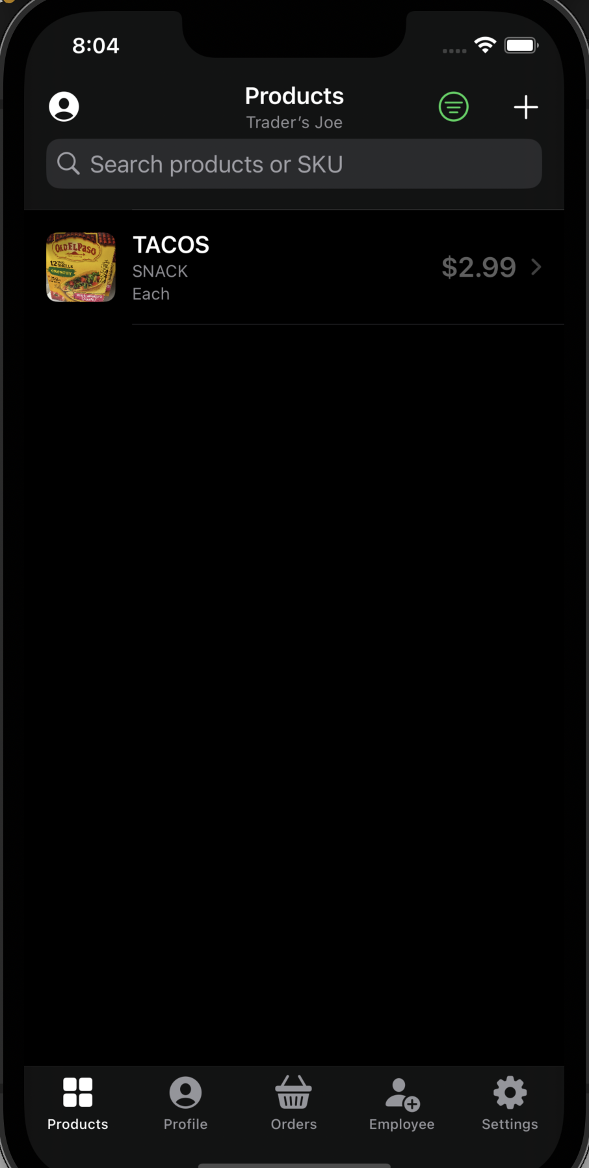
Your products will appear in a list. You can:
- Search products by name or SKU
- Tap a product to edit its details
- Filter products using the menu icon
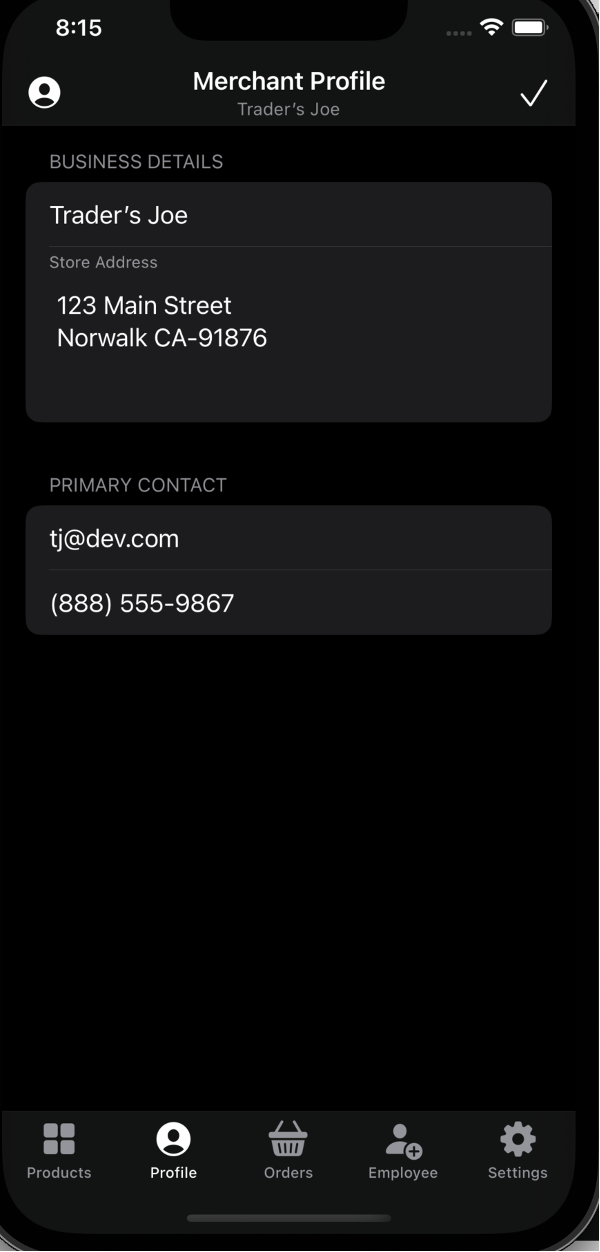
5. Managing Your Profile
View and update your business information from the Profile tab.
Business Details
Your profile displays:
- Business name
- Store address
- Primary contact email and phone
Tap the checkmark (✓) to save any changes.
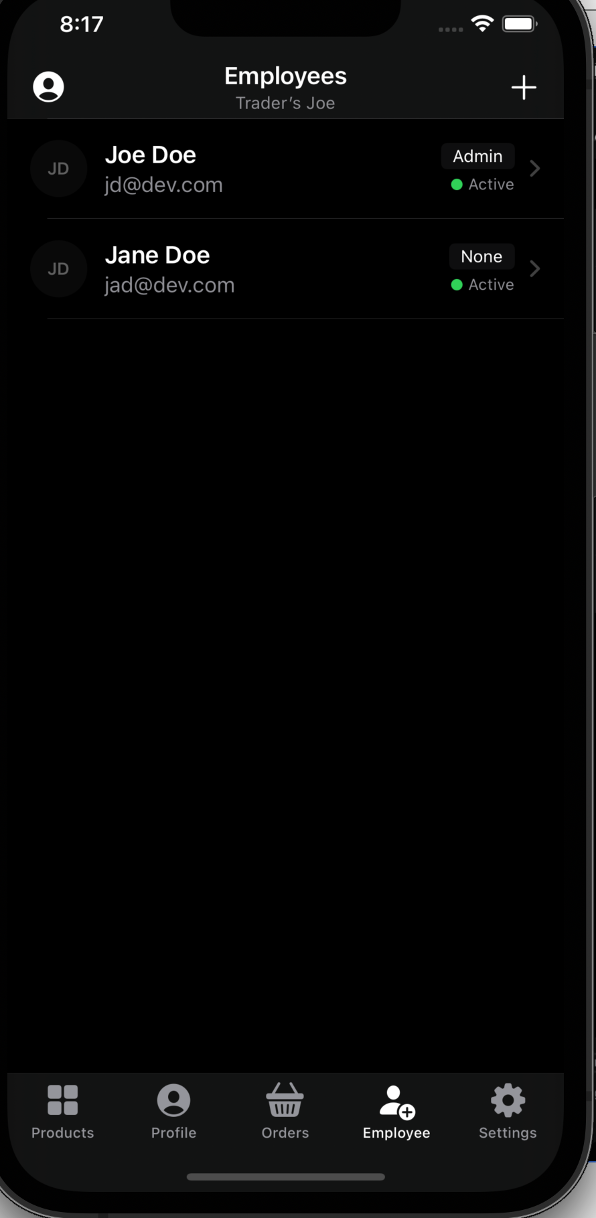
6. Managing Employees
Add team members to help manage your store.
View Employees
The Employee tab shows all staff members with their:
- Name and email
- Role (Admin or None)
- Status (Active or Inactive)
Tap the + button to add a new employee.
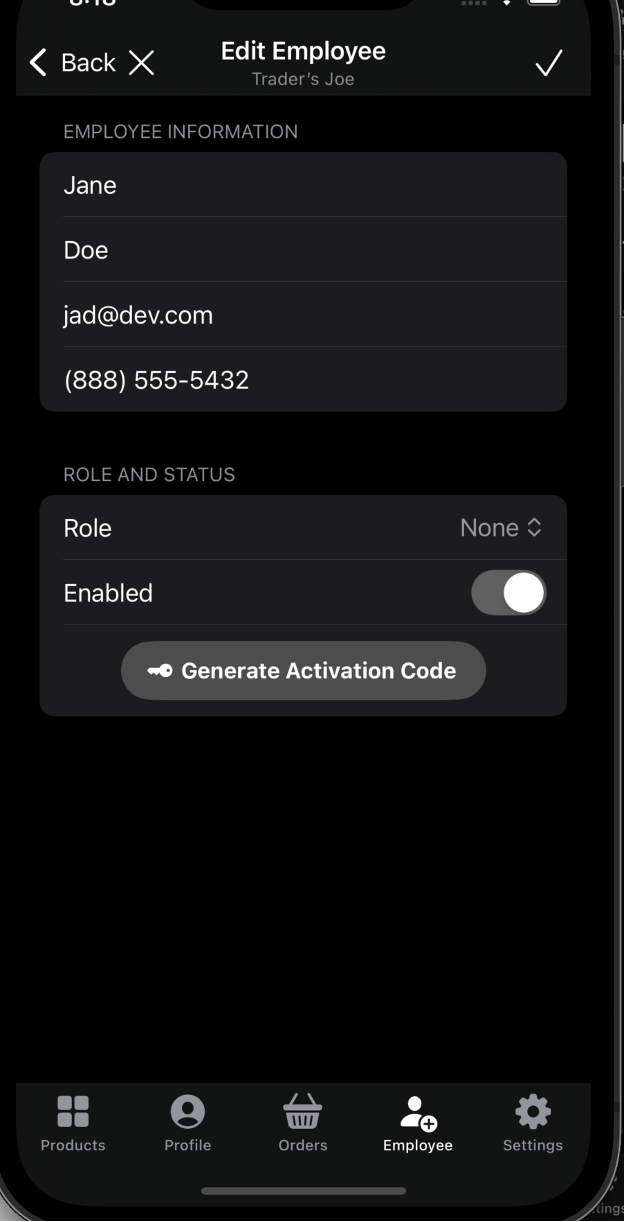
Edit Employee
Tap on any employee to edit their details:
- Employee Information: Name, email, and phone
- Role: Set their permission level (Admin grants full access)
- Enabled: Toggle to activate or deactivate the account
- Generate Activation Code: Create a code for the employee to activate their account
Tap the checkmark (✓) to save changes.
Employee Activation
New employees can join using Activate Employee on the Welcome screen with the activation code you generate.
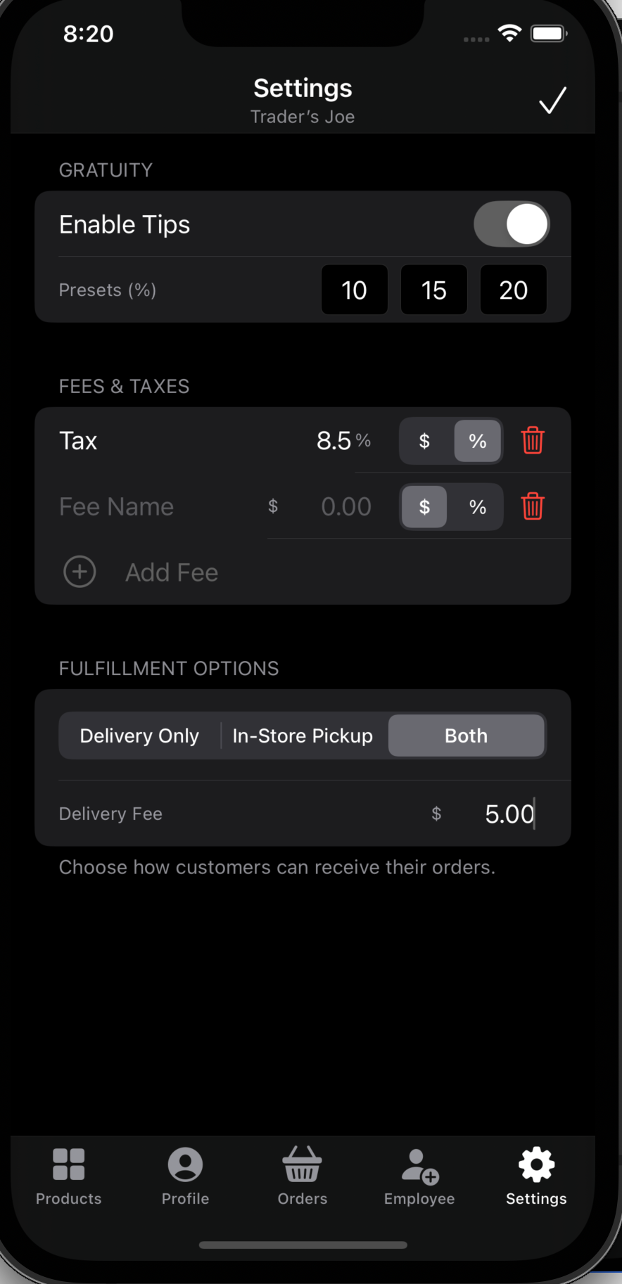
7. Settings
Configure your store's business settings.
Gratuity
- Enable Tips: Allow customers to add tips to orders
- Presets: Set default tip percentage options (e.g., 10%, 15%, 20%)
Fees & Taxes
- Tax: Set your tax rate as a percentage or fixed amount
- Additional Fees: Add custom fees (service fee, packaging, etc.)
- Tap Add Fee to create new fee types
- Use the trash icon to remove fees
Fulfillment Options
Choose how customers can receive their orders:
- Delivery Only: Only offer delivery
- In-Store Pickup: Only offer pickup
- Both: Offer delivery and pickup
- Delivery Fee: Set your delivery charge
8. Navigation
Use the bottom navigation bar to access different sections:
- Products: Manage your product catalog
- Profile: View and edit business details
- Orders: View and manage customer orders
- Employee: Add and manage staff accounts
- Settings: App settings and account options
9. Best Practices
- Quality Photos: Use clear, well-lit product photos
- Accurate Pricing: Keep prices up to date
- Stock Status: Mark items out of stock promptly to avoid customer disappointment
- Categories: Organize products into categories for easier browsing
- Respond Quickly: Process orders promptly for better customer experience
10. Troubleshooting
Can't sign in?
- Verify your email/phone and password are correct
- Make sure you've selected the correct business
- Use Forgot Password? to reset your password
Photos not uploading?
- Ensure the app has permission to access your photos
- Check your internet connection
- Try using a smaller image file
App not loading properly?
- Check your internet connection
- Close and reopen the app
- Update to the latest version from the App Store
11. Contact Support
Still need help? We're here for you.
Email us at: [email protected]
We typically respond within 24-48 hours.